

In this tutorial, I’ll show you how to Build, Test, Dockerize, and Deploy Full-Stack App to DigitalOcean.
We’ll create a complete CI/CD process utilizing GitHub Actions. The front end will be developed using React while Node.js will power the back end. Jest will be used for comprehensive testing. Docker and Docker-compose will be utilized to package the application into containers. Nginx will act as a routing solution between the React and Node.js servers and also serve as an HTTP server for the React build. The final deployment will be handled by GitHub Actions which will perform builds, tests, containerization, push Docker images to the DigitalOcean Registry and finally deploy to a DigitalOcean Droplet.
Structure of the Project
Let’s get started by creating a root directory for our project. Within this root directory, we will create two subdirectories, client for our client-side and api for the server-side.
├───  client
└───  api
Build the React App (Client)
React is a powerful JavaScript library that revolutionizes UI development with its declarative approach. With React, developers can efficiently build dynamic, responsive user interfaces that bring web applications to life.
Step 1: Create an App
So, let’s create a new React App inside the client folder.
cd client
npx create-react-app .
Step 2: Project Structure
└─── client
    │
    ├─── public
    │ index.html
    ├─── src
    │       App.css
    │       App.js
    │       App.test.js
    │       ...
    └─── package.json
After finishing the NPX process you’ll see the simple structure of React app.
- In the src folder, you can see App.js, a root component of the React Project.
- App.css – is a stylesheet file.
- In App.test.js you’ll see your first test. The Jest library is used by default for testing React applications.
Step 3: Run App
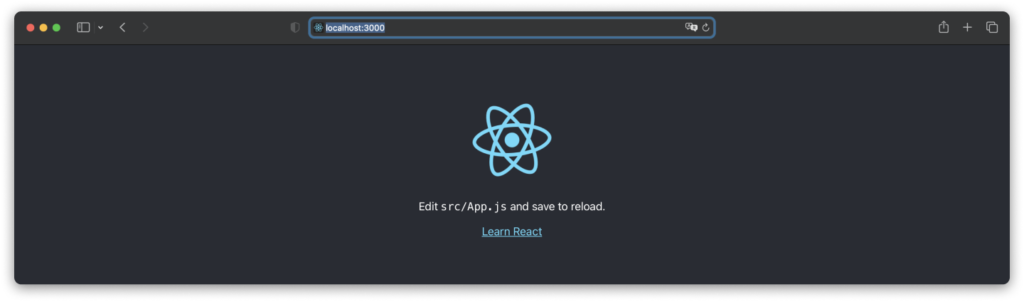
So, now let’s run our application. To do this you need to run npm start in the terminal and open http://localhost:3000/
Step 4: Run Tests
Now, let’s run the testing script, npm run test in the terminal and press a to run all tests.
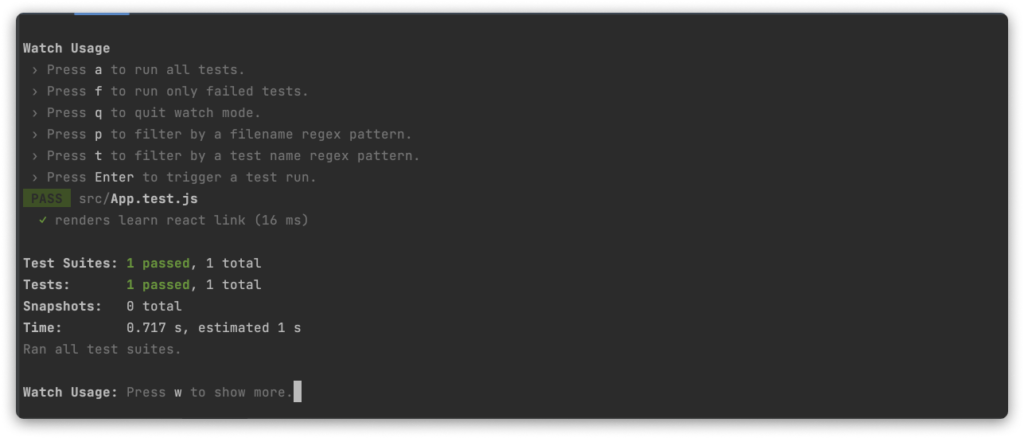
Okay, everything is good, now let’s create a server project.
Build the Node js App (API)
Step 1: Create a server project
We need to initialize the project with npm. To do this go to the api folder and run npm init -y in the terminal.
This command will create package.json for our new Node JS project.
Step 2: Install dependencies
- Express – is a Node.js framework that allows us to build API endpoints and make server requests for data. We can develop several functions that will aid in processing extra CRUD requests with the aid of Express.
- CORS – Cross-Origin Resource Sharing is an HTTP header-based mechanism implemented by the browser that allows you to use a server or API specifying any origins other than the origin, from an unknown origin, and get permission to access and download resources.
- Nodemon – is a popular tool used for the development of Node JS applications. It observes the working directory of your project and restarts the node application whenever it has any changes.
- Jest – is a JavaScript Testing Framework.
So, let’s install them.
Nodemon and Jest need only for development, so, let’s install them with a --save-dev flag.
npm install express cors
npm install nodemon jest --save-dev
Step 3: Project structure
Okay, let’s add app files.
app.js – it is a main file. In this file we’ll create express server, add cors to express app, add test router and run the server on 8080 port.
//src/app.js

//import dependencies
const express = require('express');
const cors = require('cors');

// define the port
const PORT = 8080;

// create the express app.
const app = express();

// enable CORS security headers.
app.use(cors());

// add a test route
app.get('/test', (req, res) => {
    res.json({success: true, message: "API"})
})
// Run app on the 8080 port
app.listen(PORT, () => {
    console.log(`Running on http://localhost:${PORT}`);
})
And let’s add script for run the our server.
Just add "dev": "nodemon -L src/app.js" to scripts block in package.json.
To start our server type npm run dev in the terminal and open http://localhost:8080/test.

Okay, it works.
Now let’s create app.test.js file.
In the future you’ll be able to add more complex test case to testing you server code.
//src/app.test.js

describe('Test Suite', () => {
  it('Test Case', () => {
    expect(true).toEqual(true);
  });
});
And let’s also add jest.config.json.
//jest.config.json

{
    "testRegex": "((\\.|/*.)(test))\\.js?$"
}
And last thing, add start and test scripts to package.json.
"start": "node src/app.js",
"dev": "nodemon -L src/app.js",
"test": "jest --config ./jest.config.json"
To run tests type npm run test in the terminal.

Okay, let’s look at the structure.
└─── api
    │
    ├─── src
    │       app.js
    │       app.test.js
    ├─── jest.config.json
    └─── package.json
Setting up the docker-compose for development
So, now we can dockerize our client and server applications.
Step 1: Create Client Dockerfile
In the client folder create Dockerfile for development Dockerfile.dev.
//client/Dockerfile.dev

# Pull in from the official node image.
FROM node:16.14.0-alpine
# Create app folder
WORKDIR /app
# Set environment
ENV NODE_ENV development
# Copy package.json and package-lock.json to the app folder
COPY package*.json ./
# Install packages
RUN npm install
# Copy all project files to app folder
COPY . .
# Make port 3000 available for links and/or publish
EXPOSE 3000
# Start our react app when launching the container
CMD ["npm", "run", "start"]
Step 2: Create docker-compose.dev.yml
Let’s create docker compose config in the root of the project and add a client service.
//docker-compose.dev.yml

version: "3.8"

services:
  client:
    container_name: client
    image: client
    build:
      context: ./client
      dockerfile: Dockerfile.dev
    ports:
      - "3000:3000"
    volumes:
      - "./client:/app"
      - "/app/node_modules"
restart: always- container_name – is the name of our container.
- image – is our own image.
- build – is a build config with a path to Dockerfile we created above.
- ports – this container will be available on 3000 port.
- volumes – needs for development to reload the container when we change some files in the client project.
- restart – means that docker-compose will restart the container if it stops or crashes.
Step 3: Run Docker containers
Let’s start our client container. To do this, enter the code below in the terminal (you must be in the root folder).
docker-compose -f docker-compose.dev.yml up 
If you open the docker client you’ll see our client container which runs on the 3000 port.

Okay, open http://localhost:3000.

Great!
Now let’s containerize out server side.
Step 4: Create Api Dockerfile
Create a Dockerfile.dev file for development.
// api/Dockerfile.dev

# Pull in from the official node image.
FROM node:16.14.0-alpine
# Create app folder
WORKDIR /app
# Set environment
ENV NODE_ENV development
# Copy package.json and package-lock.json to the app folder
COPY package*.json ./
# Install packages
RUN npm install
# Copy all project files to app folder
COPY . .
# Make port 8080 available for links and/or publish
EXPOSE 8080
# Start our app with nodemon when launching the container
CMD ["npm", "run", "dev"]
And we also need to add api service to docker-compose.dev.yml.
//docker-compose.dev.yml

version: "3.8"

services:
  client:
    ...
  api:
    container_name: api
    image: api
    build:
      context: ./api
      dockerfile: Dockerfile.dev
    ports:
      - "8080:8080"
    volumes:
      - "./api:/app"
      - "/app/node_modules"
    restart: always
Great, let’s start our containers. Run the code below in the terminal.
Step 5: Run Docker containers
docker-compose -f docker-compose.dev.yml up 
And now, if you open docker app you’ll see two containers, client and api.

Let’s check it. Open localhost:8080/test

Great. And if you change something in app.js you’ll see that container reloaded.
Setting up Nginx server
Let’s create nginx folder in the root of the project and create a config.
Step 1: Nginx Configs
First, let’s create a config folder configs and inside it create default.conf file.
//nginx/configs/default.conf

upstream api {
  server api:8080;
}

upstream client {
  server client:3000;
}

server {
  listen 80;

  location /api {
    rewrite /api/(.*) /$1 break;
    proxy_pass http://api;
  }

  location / {
    proxy_pass http://client;
  }
}
In this config we have the two applications upstreams, client and server(API) and Nginx server listening to port 80.
Now you’ll be able open localhost without any port. If we open localhost, Nginx will redirect us to the client server.
Step 2: Nginx Dockerfile
Inside nginx create Dockerfile.
//nginx/Dockerfile

# Pull in from the official nginx image.
FROM nginx:stable-alpine

# Delete the default welcome page.
RUN rm /usr/share/nginx/html/*

# Copy over the custom default configs.
COPY configs/default.conf /etc/nginx/conf.d/default.conf

# Make port 80 available for links and/or publish
EXPOSE 80

# Start nginx in the foreground to play nicely with Docker.
CMD ["nginx", "-g", "daemon off;"]
Step 3: Add gateway to docker-compose config
Let’s add nginx to docker-compose.dev.yml
//docker-compose.dev.yml

version: "3.8"

services:
  nginx:
    container_name: gateway
    image: gateway
    build:
      context: ./nginx
      dockerfile: Dockerfile
    ports:
      - "80:80"
    depends_on:
      - client
      - api
    restart: always
  client:
    ...
  api:
    ...
This is almost the same service as client or api except depends_on.
depends_on – it sets the order in which services should start and stop.
Step 4: Run Docker containers
docker-compose -f docker-compose.dev.yml up 
Okay, all containers started, let’s open docker app.

Yes, now you can see three containers, api, client and gateway.
Let’s check nginx in the browser. Open http://localhost

As you can see we don’t use port to open our app.
Let’s check api server. Open http://localhost/api/test.

Yes, everything works correctly.
I want to note that reload the client and server will also work with nginx.
Setting up the docker-compose for production
At the root of your project, create a docker-compose.yml file.
Step 1: Client Dockerfile
Create Dockerfile in the client folder.
//client/Dockerfile

# Pull in from the official node image.
FROM node:16.14.0-alpine AS builder
# Create app folder
WORKDIR /app
# Set environment
ENV NODE_ENV production
# Copy package.json and package-lock.json to the app folder
COPY package*.json ./
# Install packages with production flag
RUN npm ci --only=production
# Copy all project files to app folder
COPY . .
# Make a new production build
RUN npm run build

# Pull in from the official nginx image.
FROM nginx:stable-alpine
# Copy all built files to nginx folder
COPY --from=builder /app/build /usr/share/nginx/html
# Copy over the custom default configs.
COPY --from=builder /app/nginx/default.conf /etc/nginx/conf.d/default.conf
# Make port 3000 available for links and/or publish
EXPOSE 3000
# Start nginx in the foreground to play nicely with Docker.
CMD ["nginx", "-g", "daemon off;"]
Unlike the development configuration, we install npm packages with production flag and make a production build.
The production build creates a build folder, there are index.html, css, js scripts, and other media files.
Then we copy the all files from build folder to /app/build directory.
Then we run Nginx on the 3000 port.
Nginx will serve the content from the build folder whenever it receives a request on the root path (http://localhost).
So, let’s add nginx/default.conf file.
//client/nginx/default.conf

server {
  listen 3000;

  location / {
    root /usr/share/nginx/html;
    index index.html index.htm;
    try_files $uri $uri/ /index.html;
  }
}
Step 2: Server (API) Dockerfile
Okay, now let’s create a production Dockerfile for server.
//api/Dockerfile

# Pull in from the official node image.
FROM node:16.14.0-alpine
# Create app folder
WORKDIR /app
# Set environment
ENV NODE_ENV production
# Copy package.json and package-lock.json to the app folder
COPY package*.json ./
# Install packages with production flag
RUN npm ci --only=production
# Copy all project files to app folder
COPY . .
# Make port 8080 available for links and/or publish
EXPOSE 8080
# Start our command when launching the container
CMD ["npm", "run", "start"]
Unlike the development configuration, we also install prodiction packages and run “start” script, not “dev”.
In production, we don’t need nodemon as we have a new build we need to stop the old container and start a new one.
Step 3: Create docker-compose.yml for production
And the lst thing, let’s create docker-compose.yml file
//docker-compose.yml

version: "3.8"

services:
  nginx:
    container_name: gateway
    image: gateway
    build:
      context: ./nginx
      dockerfile: Dockerfile
    ports:
      - "80:80"
    depends_on:
      - client
      - api
    restart: always
  client:
    container_name: client
    image: client
    build:
      context: ./client
      dockerfile: Dockerfile
    ports:
      - "3000:3000"
    restart: always
  api:
    container_name: api
    image: api
    build:
      context: ./api
      dockerfile: Dockerfile
    ports:
      - "8080:8080"
    restart: always
As you can notice that this config is almost the same as the docker-compose config for dev except for one thing, in this config we don’t need volumes as we don’t need source code for real-time reloading.
Let’s check it.
Before running the docker containers make sure that you stopped and removed old containers and images.
docker-compose -f docker-compose.yml up -dLet’s open docker app.
Great! Now you can check client and api services in the browser. open http://localhost and http://localhost/api/test.
This is the end of the first part of this article.
In the next article, you will find a detailed guide to building CI/CD using GitHub Action and DigitalOcean.
Thank you for reading 🙂
